🎛 Turning Raspberry Pi Zero into a powerful step sequencer
Disclaimer: writing this up in English on request.
Ever dreamt of owning a powerful multitrack step sequencer that can do almost anything? Well, here you can have it for just as much as $15 + a little time for preparing.
First, go buy a Raspberry Pi Zero W, preferably 1st gen if you want to use a powerbank as your power source. Any other version of Pi (except Pico, it does not run Linux) would suffice too.
Preps
After you have your Pi ready, you'll need to flash a RaspiOS distro onto a microSD card to boot it up. Your best choice would be a headless Lite version RaspiOS flavor as it won't waste precious CPU power on running Desktop Software idle; this is particularly important for Pi Zero W. I highly recommend using Balena Etcher for flashing images to save your time.
After a microSD card is ready, we can boot the Pi up. If you don't have any external display and/or keyboard ready to use, you'll have to follow a headless setup guide. I assume you know what you're doing and what SSH is.
Setting up a sequencer
Although in Linux there are tons of ways to emit MIDI signals, I'm gonna stick to one I prefer: Orca-C.
To get Orca-C installed on your Pi, SSH onto your board and then run following commands:
sudo apt update && sudo apt install git build-essential libportmidi-dev
git clone https://github.com/hundredrabbits/Orca-c.git
cd Orca-c && make
sudo mv build/orca /usr/local/bin
That's it! You're ready to go! Now you can type orca and make your first jam!
In order to get familiar with Orca, I highly recommend you to watch this tutorial.
Connectivity
Here you have two options: MIDI through USB, and MIDI through UART.
First one is easy, you just need to connect your USB MIDI device to your Pi either directly, or through an OTG cable, or a USB hat. After you've done it, make sure the device is ready and available by typing amidi -l command. You should see your device in the list. In some cases it is recommended to power your MIDI devices externally, please be sure to check out user manuals.
Second option is to route MIDI through header pins of your Pi. This might be somewhat challenging, especially if you're using SPI displays. However, this is the option I prefer the most, it works reliably and is more compatible with 5 pin MIDI devices. To get started you'll have to setup your Pi and do a relatively easy soldering job.
Put the lines below at the end of /boot/config.txt file of your Pi (warning: this has been tested only on Pi Zero W 1st gen):
enable_uart=1
dtoverlay=pi3-miniuart-bt
dtoverlay=midi-uart0
This config ensures following (respectively):
- UART gets enabled
- Bluetooth gets moved to a (more) crappy UART
uart0's clock rate gets adjusted to MIDI baud rate (without this config your MIDI output signal will get scrambled)
After saving the file, reboot your Pi to apply changes.
This is just a serial port setup, now you'll need something to receive MIDI signals and send them there. Here ttymidi comes to rescue. Make sure you run following commands:
sudo apt update && sudo apt install libasound2-dev
git clone https://github.com/cjbarnes18/ttymidi.git
cd ttymidi && make && sudo make install
sudo cat << EOF > /etc/systemd/system/ttymidi.service
    [Unit]
    Description=A serial to midi bridge for ORCA
    [Service]
    Type=simple
    ExecStart=/usr/local/bin/ttymidi -s /dev/ttyAMA0 -v -b 38400
    [Install]
    WantedBy=multi-user.target
EOF
sudo systemctl daemon-reload && sudo systemctl enable ttymidi.service && sudo systemctl start ttymidi.service
At this point you'll have working MIDI interface, you can check it by running aconnect -l command.
Now you'll need to craft a MIDI socket for your Pi. Grab three female jumper wires, trim and strip two of them, solder 2 220 Ohm resistors to the stripped ends. Now grab the third wire and trim it to the length of the other two (with resistors soldered). Once you get all three wires ready grab a DIN5 female socket and solder all three wires to three middle pins of the socket with bare wire in the middle. Please refer to diagram below (taken from sandsoftwaresound.net):
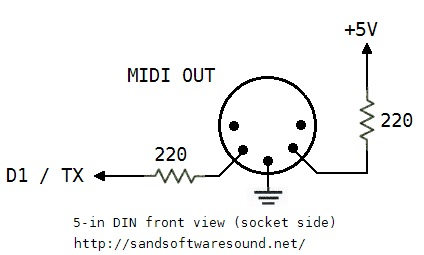 MIDI out socket wiring diagram
You might want to apply some heatshrink to protect solder joints.
Now it's time to connect your new MIDI adapter to Pi. Locate pin headers, then connect +5V wire from MIDI socket to pin 4, ground (bare) wire to pin 6, and TX wire to pin 8. Please refer to diagram below to find right pins (taken from pi4j.com):
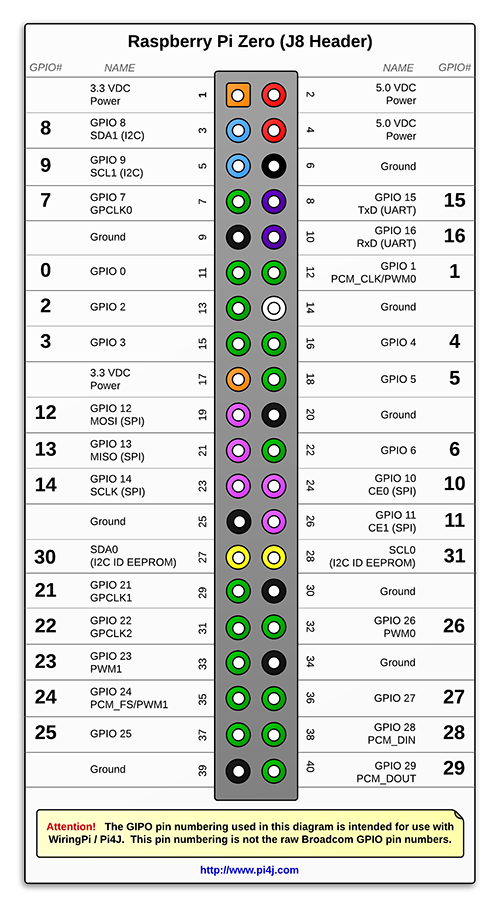 Pi Zero W rev1 pinout diagram
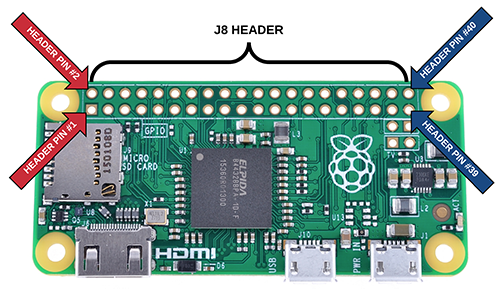 Where pins can be found on board
Now you're ready to test MIDI! Connect your favorite synth to pi zero, launch orca, press <F1>, then select MIDI output from the dropdown menu (should be marked as MIDI in, which is not quite obvious), and try to put some sequences from the tutorial above!
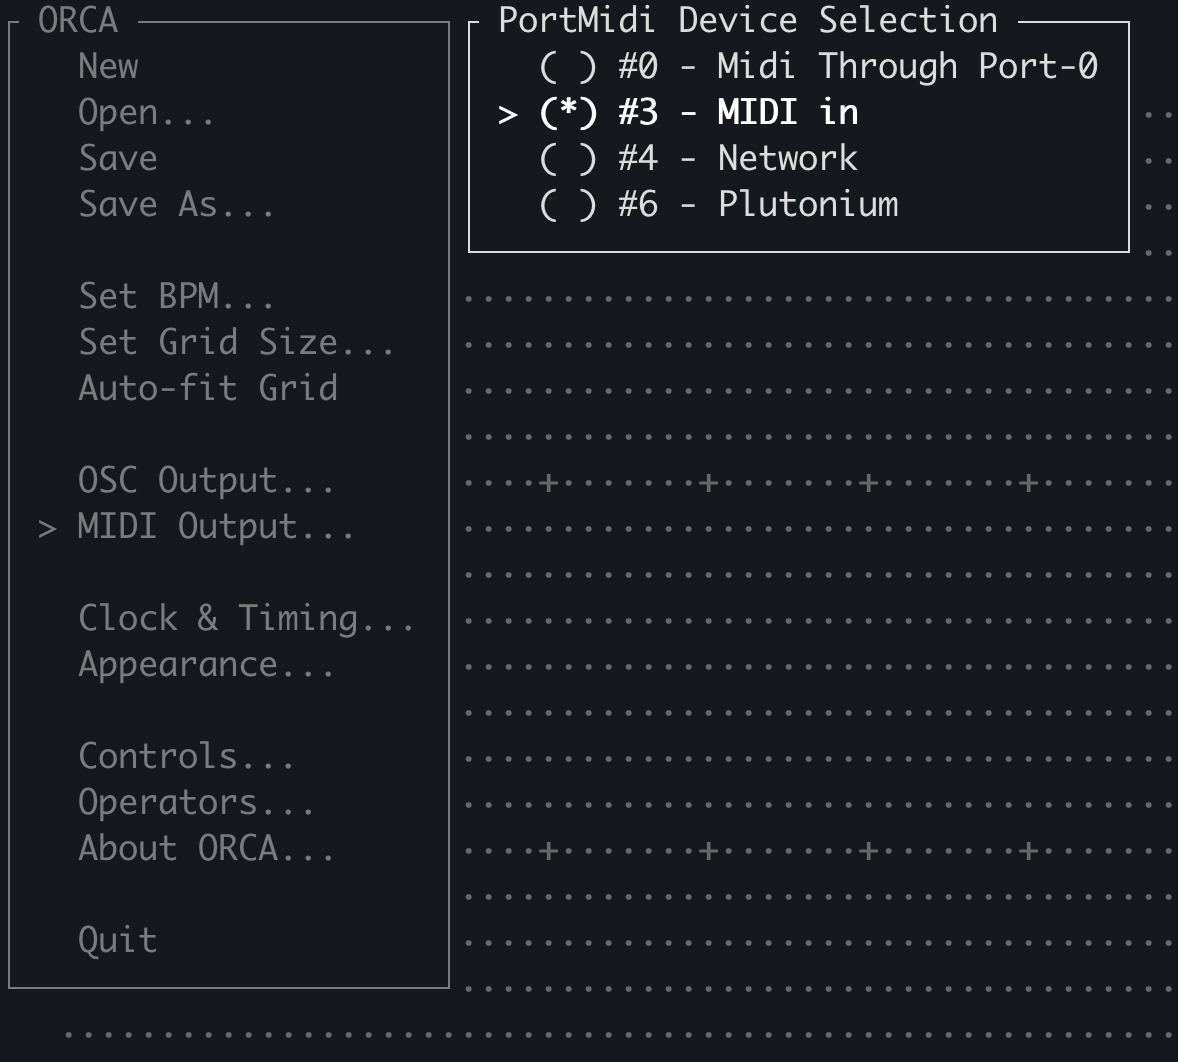 Selected MIDI output
Conclusion
After just a tiny bit of setup and maybe soldering, you will have one of the most powerful step sequencers in the world at your fingertips. One thing it might lack for sure is immediacy of pads and knobs. On the other hand you can build nearly anything, adjusted to your taste. This is something like a modular synthesizer: it takes relatively long to build a patch, the learning curve is much steeper, but in the end you get an infinite amount of flexibility.
Happy jamming!
Mon, 1 Aug 2022 13:12:42 +0200
RSS // Telegram // Статистика